Yoga Tips & Tricks: Conquering Mountain Pose (Tadasana)
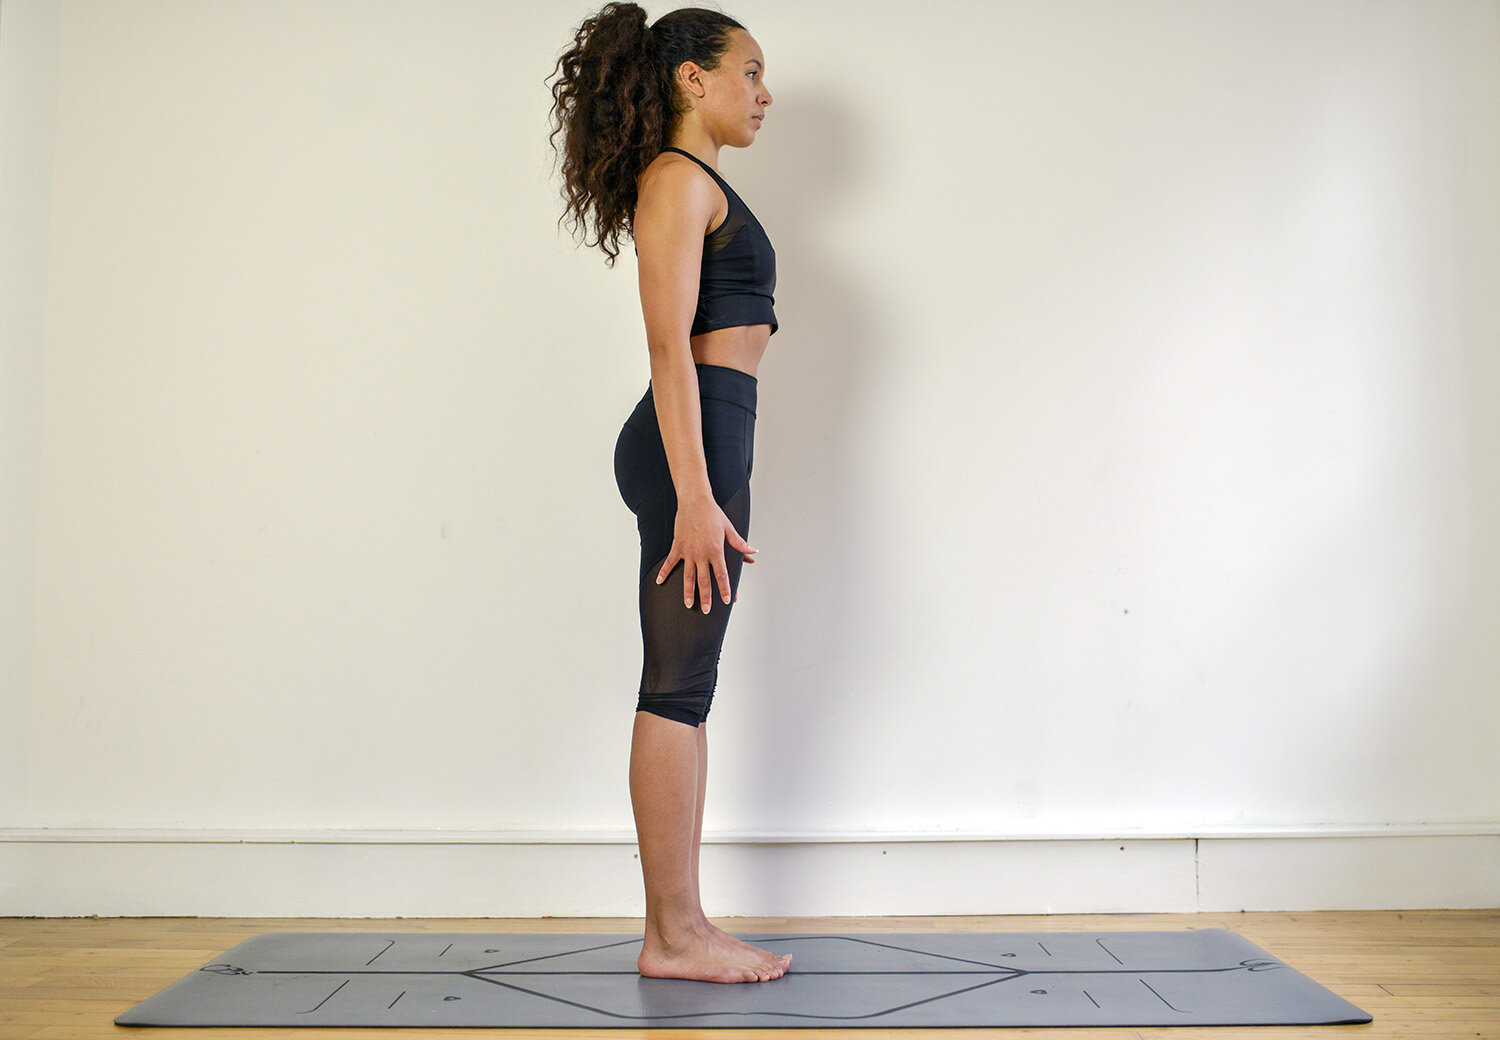
Ashley Bailey in Mountain Pose (Tadasana), by Heather Elton.
As a beginner, starting something new can seem daunting and sticking with it when you are struggling can only add to the challenge. So, I decided to create a series of tips and tricks to help you find your strength and ease in some of the foundational yoga poses. These tips are not only for class but can also be practiced at home.
Some of the most common poses you will find in most Hatha or (Hatha based*) yoga classes are:
Mountain Pose (Tadasana)
Low and High Lunge (Anjaneyasana)
Childs Pose (Balasana)
Easy Pose (Sukhasana)
Corpse Pose (Savasana)
In the second edition of our Yoga Tips & Tricks series we will be looking at Mountain Pose (Tadasana).
Every time I hear or say Tadasana in a yoga class, I hear the proclamation “Tada!” in my head. Occasionally accompanied by jazz hands.
“Tada!”
It is a pose we come back to time and time again. It marks the beginning and end of a sun salutation, often the beginning and end of a class. It is a “rebound” posture, a point in the practice to pause, relax and observe the subtle movements and changes within the body.
When we are in a bad place mentally it has an effect on the way we hold ourselves. Daily stress, the hustle and bustle of city life and everyday micro-agressions cause us to hunch over, away from the world, protecting our soft underbellies. Substantial research has been done on the effect of posture on our physical and mental well being, from social psychologist Amy Cuddy’s suggestions that “power posing” could boost feelings of confidence to the influence core strength has on our stress levels.
“How we move, think, and feel have an impact on
the stress response through real neural connections.” - Dr Peter Strick (Neuroscientist)
We can walk around so unaware of our body that it has a powerful effect when we’re shown a reflection of ourself and find alignment that feels good in our body. This awareness developed and sustained through practice is what can give us strength, stability and agency, both on and off the mat.
I’ve felt this on many occasions after a yoga class, when I was convinced that I was too tired and there was no way I was getting out of my funky mood. I would subsequently find myself riding an entirely different wave out of the class with a spring in my step and love in my heart.
The foundation of Tadasana is literally the farthest thing from our minds, our feet. I invite you to take a moment standing in Tadasana. You can try it in your next class, standing waiting in a queue or for the kettle to boil. Mentally scan your body from head to toe, then follow these steps and notice the difference in your posture. You may never look at or stand on your two feet the same way again. You’re welcome!
Mountain Pose: Step-by-Step Instructions
Step 1: Stand with the base of your big toes touching, heels slightly apart (so that the outside edges of your feet are parallel). Lift and spread your toes and the balls of your feet, then relax them back down.
Step 2: Keeping your lower belly soft, activate your thigh muscles and lift the knee caps (lift your quads). Lift the inner ankles to strengthen the arches of your feet. Imagine a line of energy rising all the way up from the arches of your feet, along your inner thighs to your groins (yes, there are two! Left and right.), follow that line of energy up through the core of your torso, neck, and head, and out through the crown of your head.
Step 3: Tuck your shoulder blades in towards one another then let them slide down your back towards your hips. Draw your lower front ribs back into your body and lift the top of your sternum straight toward the ceiling. Broaden across your collarbones and your arms hang beside the torso. Keeping the arms and fingers active, visualise energy flowing down your arms and out through your fingertips.
Step 4: Balance hips over heels, shoulders over hips and the crown of your head directly over the centre of your pelvis. Have the underside of your chin parallel to the floor, soften you throat and relax your tongue. Soften your eyes and the muscles of your face.
Step 5: Stay in the pose for 30 seconds to 1 minute, breathing easily.
Tips & Tricks
Check your alignment: You may find more stability in this pose by standing with your feet hip distance apart. Or you can challenge your balance by closing your eyes. Closing your eyes is a great way to improve your awareness of the inner workings of the pose and your alignment.
Notice where you are carrying your weight: Find a gentle rocking motion, back and forth and side to side. Gradually reduce this motion until you are standing still with your weight balanced evenly across the feet.** Do you stand with your weight further forward towards your toes or back towards your heels?
Don’t flatten the curve of your lumbar spine by tucking your tailbone down, under or anywhere else for that matter. This will push your hips forward and prevent you from finding that long line from your feet through the crown of your head.
Other Variations: Bring your palms together at heart centre (Anjali mudra) or try interlacing your fingers behind your back, reaching the hands down past the tailbone and lifting the sternum straight up.
Check your breath: Notice the effect that adjusting your alignment has on your breathing. As you inhale visualise energy rising from the base of your spine and up through the crown of your head drawing you taller. As you exhale, maintaining the length of your spine visualise your weight dropping down through your heels, into the earth.
Use props: I’m a big fan of props. They are not cheating. They are only a crutch if you make them one. Use a block gripped between your thighs to engage your adductors (inner thighs muscles), grow tall from the arches of the feet and press your inner thighs back behind you.
Check you out!: There is no shame in taking a look at yourself in the mirror. It can be a great way to see the natural alignment of our body in a posture. Do the arches of your feet drop? What effect does that have on your knees, your pelvis, your spine, shoulders and the position of your head?

Tadasana is often the starting position for standing postures, however it can be useful to practice Tadasana on its own.
I hope you’ve found these tips useful. Keep an eye out for the next post in the series where we will be taking a look at Low and High Lunge (Anjaneyasana).
* All of the following are styles of Hatha Yoga: Ashtanga, Anusara, Bikram, Jivamukti, Kripalu, Kundalini, Iyengar, Sivananda and Viniyoga.
** In Hatha Yoga this pose is sometimes called "Four Part Standing Pose”, because we are standing with even pressure across all four corners of the feet: the big toe joint, the little toe joint and the back two corners of the heels.